- "Here, a map of the ship for you. Compliments of the White Star Line. I have taken the liberty of indicating your cabin, C-73."
- —John Smethells.
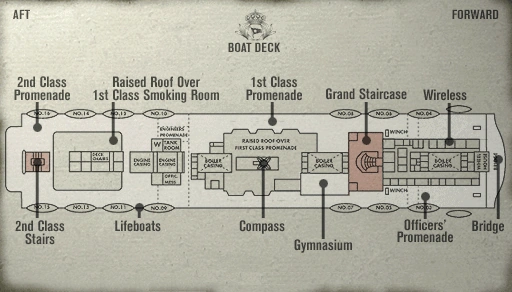
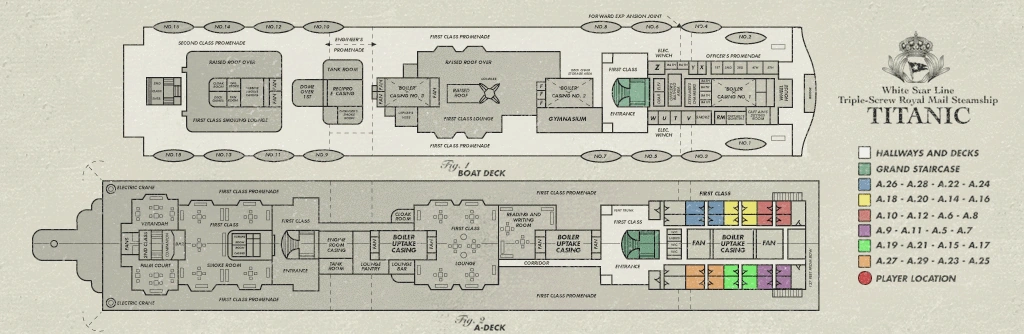
The map is an important document detailing the layout of the decks of the RMS Titanic. Frank Carlson is given a copy of this map on the evening of 14 April, 1912 by his steward, John Smethells.
The map can be accessed at any time during Carlson's mission by clicking on it at the bottom of the screen. Each deck can be analysed individually and Carlson's current location will be shown on the appropriate deck by a flashing red dot. Carlson's cabin and Penny Pringle's cabin are also highlighted with annotations.
The map also allowed Carlson to 'jump' to different parts of the Titanic that are highlighted in red on the map, allowing for faster navigation except in the Boiler Rooms and Cargo Hold, where jumping will be disabled. After the ship strikes the iceberg, jumping to these areas is disabled. During the tour version, jumping to the red areas is allowed at anytime.
The Map[]
Click on a specific location to be directed to the respective article.
Boat Deck[]
A Deck[]

B Deck (Bridge Deck)[]

C Deck (Shelter Deck)[]

D Deck (Saloon Deck)[]

E Deck (Upper Deck)[]

F Deck (Middle Deck)[]

G Deck (Tank Top)[]

Trivia[]
In Titanic: The Lost Mission, the demo version of the game, an alternate map is used. The map is present at the beginning of the game on top of Carlson's dresser along with his watch, and is not given to him by Smethells. Since the demo features significantly less of the ship than the complete game, the demo's map only covers A-Deck and the Boat Deck.
| Objects on the RMS Titanic | |
|---|---|
| Main Objects | Lambeth Diamonds | Notebook | Painting | Rubaiyat |
| Others | Antidote | Barbicon's Safe | Binoculars | Boat Pass | Car Keys | Cargo Manifest | Carlson's Trunk | Cigarettes | Conkling's Letter | Cryptograph | Cufflink | Electric Camel | Gas Pen | Gramophone | Map | Package | Photographs | Prayer Card | Punching Bag | Satchel | Ring | Shawl | Secret Report | Steamer Trunk Key | Telegrams | Water Gauge | Zeitel's Bomb |